Monday, December 29, 2008

almost ready to install the aft bulkhead

Spent the weekend recovering from the holidays and getting ready for the next big project, which is installing a new aft bulkhead. Had intended to get it in over the weekend, but somehow ran out of time. I'm not sure how it happened? I know there were beers involved... :D Seriously, by the time we were ready on Sunday, we realized we'd run out of weekend before we even came close to getting the bulkhead tabbed in. And remember, if your epoxy cures in between layers or coats, the bond will only be mechanical (not as strong), not chemical (stronger). We want a chemical bond, so I think the best bet is to get it all ready to go and start fiberglassing early next Saturday.

Part of this problem is that we are using a medium curing epoxy. It takes longer to cure so our projects all seem to get stretched out a bit more than desireable. I ordered a gallon of MAS resin today and decided to try out the fast curing hardener so I ordered a half gallon of it. Were it summer in Louisiana, this would probably not give me enough working time, but it's winter here so it should work good perfect. And one of the coolest things about MAS epoxy (besides it's price and quality) is the fact you can mix hardeners to create your own set time. Pretty cool.

But I digress...

First, as with every project so far, is a stop at Lowe's (or Home Depot if that's yer deal) to buy things I should probably already own, but don't. The main purchase this time were some clamps to hold the aft bulkhead in place while it is being tabbed in.

Photobucket

Next up, we installed the new bulkhead and set it up with clamps to hold it in place and then made sure it was in there even and level. And then we added the foam pieces underneath the bulkhead to avoid creating any hard spots on the hull.

Photobucket

All level and ready to go this weekend! So this Saturday will be spent tabbing in the new aft bulkhead and also installing the bridge step support. Yay! :D

Monday, December 1, 2008

boat building

Since we finally got the keelson in, it's on to the next structural pieces; the bridge step support and the aft bulkhead.

The keel winch on my boat was originally located inside the cabin, behind the companionway bulkhead, with the handle protruding from the bulkhead. A previous owner (I believe my boat has had many) moved the keel winch to the cockpit, most likely for easier singlehanding. We decided to keep it in the cockpit so it's going right back where it was. Unfortunately, the previous owner that moved it did a terrible job at keeping the water out and the wooden board (bridge step support) that was originally glassed in rotted. So a new one must be installed to give the winch something sturdy to attach it to. There is a lot of force at work when lowering and raising a heavy keel, so the bridge step support is important.

The aft bulkhead was more of the same. The boat was neglected and water was allowed to stand in the cabin. As a result the aft bulkhead had rotted near the bottom.

So this past weekend we picked up some wood and fabricated a new bridge step support and aft bulkhead. The bridge step support is a simple rectangle. No problem there. The aft bulkhead was a more complicated shape so we used a big piece of foam to do a mock up of the part to make sure we got it right. 'Cause wood is really expensive, and nothing seems to go right the first time anyway. :D

Photobucket

And then we installed the foam part and tried it out in the boat.

Photobucket

A few minor adjustments were made to the foam template to get the perfect fit. Then we traced the template onto a piece of hardwood and cut it out and routered all the edges.

Here are the two new pieces, the bridge step support on the workbench and the aft bulkhead is leaning against the wall behind it.

Photobucket

The Heineken is self explanatory. :D

safety update

This seems to help.

Photobucket

Since I began treating all uncured epoxy like the hazardous material that it is, I've had much better luck with my epoxy and fiberglass allergy. I don't handle the fiberglass tape at all unless I'm completely covered in protective clothing and don't even think of handling the uncured epoxy unless I'm wearing every bit of protective clothing I have, including a respirator and eye protection.

Since that pic was taken I found some nitrile gloves that are thicker (meant to be used again and again) and have a longer protective sleeve on them. I don't have to tape these gloves on, which is nice. I found that using these longer gloves, which offer more protection, work especially well if you put the cheaper disposable nitrile gloves on top of the thick ones. Then you can just peel off the disposable ones when they get nasty and the nice ones that offer most of the protection are preserved.

Safety is key, yo.

i feel like a surgeon


We finally got the first real structural piece replaced in the boat. My boat has a new keelson! Yay! It's like she has a backbone again. It was an intimidating project, but looking back now it was all pretty simple and straightforward. And Pam and I both have a LOT more confidence in our fiberglass skills.

Photobucket

Photobucket

Still need to cut out the hole in the keelson for the cockpit drain and install the cockpit drain. Then we're done with this tiny area of the boat, and on to the rest of it. It never ends. It will never end. For as soon as we get it all fixed, things will be wearing out again. It reminds me a lot of bicycles. Constant tuning and adjustments, and constant wear and tear of components. Things always need replacing, or sometimes you just want a new one or a cooler looking one. One thing is certain, I should know everything there is to know about this boat when it's all said and done. Fer realz.

If it weren't for these two


NOTHING would get done.

Photobucket

The Mr. Heater is propane-powered and puts out serious heat for it's size. We have an adapter that we can use to hook it to a large propane tank, just need to get the large tank refilled.

Photobucket

I've had this electric Black & Decker heater for several years now. It just keeps on going. It also puts out a lot of heat for it's size. As long as it's not too drafty, it can keep up.

Seriously, we're both small and female and neither of us likes the cold. I see Belize in my future, if you catch my drift.

Next up, all the stuff we've done lately thanks to the heaters.


And if it weren't for these two, things would be much less exciting.

Photobucket
Katie gets to hang out with us in the boat shop some. She's very trustworthy. Right here she's just wishing we'd all go in and lay down on the bed.

Photobucket
Buster is a spaz of monumental proportions and has to stay in the yard or house - no boat shop for him. He's the sweetest thing on earth to us but is unpredictable with strangers. He's a terrier, what more do I need to say? :D Here Buster is thinking that he would really like to bite you on your ass. It's all squishy and he loves the sound you'll make when he bites it.

Thursday, October 30, 2008

this blog is too serious.


I'm a silly person and my boat is gonna be sailed by two silly people, so some sillyness must exist here, dammit!

Photobucket

Tuesday, October 28, 2008

Portlights removed!

In between all the drama from the Great Epoxy Fiasco of 2008, Pam and I got the portlights (windows) removed. They had to come out due to the extreme lack of a seal around them. Right after I bought the boat I watched in horror as it rained and the portlights leaked so bad it was pouring water inside the boat. A very bad thing. So we knew from the start that they would have to be either replaced or at least removed, cleaned and resealed.

First, the removal.

Most of the screws holding the portlight brackets/frame in came right out, but there were several that wouldn't budge, and a few were completely stripped. So I got one of those cheap screw extractor sets that you lightly hammer one side of the bit into the offending screw, and then use the other side of the bit with a drill to back it out. The first shot at removal saw the extractor bit breaking off into the old screw. Hmmm, now what? On a trip to the store to replace the broken screw extractor bit I'd just damaged I found one called Grab-It! The Grab-It had much beefier bits than the cheapo one I'd just broken, and wouldn't you know it, it removed all the offending screws, except the one that had the broken extractor in it. Luckily, that one came out with a pair of vice-grip pliers. Whew!

That's an entire paragraph just about screw removal. Ha!

The portlights were held in place with a little piece of metal and a few rivets. Rivets are sometimes hard to remove, but my hammer won!

Photobucket

Photobucket

Not exactly sure how I'll secure them when we put them back in, but you can bet it won't be with rivets!

Then, of course, all the gooped up globs of prehistoric silicone had a good grip as well, so with a lot of prying and pulling they finally popped out.

Here are the portlights removed.

Photobucket

Poor Wahoo looks all naked (pronounced neckid in the south) without her windows!

Photobucket

Photobucket

It took quite a while to remove all the silicone from around the windows. I hate silicone. I know it has it's uses, but I seriously hate the stuff. Something about the way it looks when it's aged with years of dirt and grime. I think the only way I can put silicone on my boat is if it's white. That clear stuff just creeps me out, yo.

The lack of windows will provide a little added ventilation for the upcoming epoxy jobs, so we'll leave them out for a while. And since there doesn't seem to be any replacement options that will work without cutting bigger holes out of the deck or making them smaller, I think we'll just clean these up and reinstall them. Hopefully with a little care at installation and some good sealant they'll work fine.

The frame parts of the windows are aluminum and had been painted on the inside, but most of the paint seems to be coming off with some acetone and a hard brush. I don't like using acetone if I can avoid so i think we may try lightly sanding it.

Photobucket

So, despite the Great Epoxy Fiasco of 2008, things are progressing well.

Cheers and happy boat repairing!

The Great Epoxy Fiasco of 2008


That is how it will be remembered by those of us who were there.

I ordered my epoxy in bulk back in March of this year. Because of the enormity of the project I knew I'd be buying the stuff every few weeks if I went with smaller amounts, so buying in bulk just made sense. Since I was buying large bottles buying the pump set to get accurate measuring when mixing the resin and hardener was a no-brainer. Unfortunately for me, the no-brainer part caused me a lot of problems. You see, on the resin bottle it says mix 2:1 with hardener (that's 2 parts resin to 1 part hardener) and on the hardener bottle it says mix 1:2 with resin (that's 1 part hardener to 2 parts resin). So I had this whole 2 to 1 thing going on in my head. And when I received my epoxy and pump set nowhere on the packaging does it say that the pumps are calibrated to be 1 pump each. I didn't notice the little plastic strip glued to the pump to keep it from pumping all the way down, and there was no mention of it when I ordered or received the product. Since my epoxy containers said mix 2 to 1 and my pumps had no directions at all I assumed wrongly that that meant 2 pumps resin to one pump hardener.

I probably would have caught on sooner that my mix was off were it not for two factors. One, the stuff I mixed cured, though a bit more slowly than I was expecting, but it cured rock-solid. The tackiness stage lasted longer than I thought it would, but it is a slow/medium hardener so I figured it was geared more to the slow side. The other factor that kept me from catching the mix-up sooner was that I kept both the resin and hardener containers with pumps installed in a big plastic tote that also had my rolls of fiberglass tape, my acetone, and my assortment of epoxy tools. So I just kept pumping out my wrong mix, over and over again....not noticing anything was up until I took them out to clean out the tote and noticed there was all this hardener left and almost no resin. Oops. Had it not been for that I would have kept on going for several more batches...mixing wrongly with no clue at all.

Well, needless to say I was pretty pissed off initially as all the epoxy work I had done since March is suspect,, meaning we would have to grind it all out and start all over again. Ugh. So after a few days of seriously feeling very down about it all, I recouped and Pam and I got almost all of the bad epoxy out this weekend, everything except the non-structural fillets. Those will be fine as they are. But seriously, the wrongly mixed stuff cured hard, like really really hard. Like we had to buy a new corded angle grinder because the battery-powered one couldn't keep up. Seriously, I don't even understand how epoxy mixed with only half the hardener could get that hard, but it did.

So now we're back where we started, but with a lot more knowledge about epoxy and especially about mixing epoxy. ;)

Thanks to the 2 of you who saw my 'freak out' post and gave me encouragement. It was very much appreciated.

Happy to be back on the right track! Cheers!

Tuesday, October 14, 2008

I'm restoring a fiberglass boat....

...and am severely allergic to fiberglass. WTF :/

Well, severe might be the wrong word as it isn't affecting my eyes, etc. But it does seem to get worse with every exposure.

Researching...

Fiberglass MSDS

Epoxy MSDS

Acetone MSDS

Thursday, October 2, 2008

fillets, fillets and more fillets!

Before I started work last weekend on the boat my friend Dan came over to see how it was progressing. We sat in the cockpit and drank some beers and caught up a bit while he chain smoked marlboro lights. It was our first "Boat Party!" I assumed he was holding his smokes away from the boat as his arm just disappeared over the side and only reappeared when he took a drag.

Well,.......SHIT!!!!!

Photobucket

Dan, if you read this...I love you to pieces, but no more smoking on the boat, man.

Photobucket

Had to happen on a part that had been wet sanded already. Sorry, Wahoo. I'll do better in the future.

Mom (Pam) and I got up bright and early last Saturday and got to work sanding the fiberglass we had laid the weekend before, so that the next layer will stick. We had planned on building up the keelson area some more and then hopefully finally get the keelson glassed in. However, we decided to work on fillets instead, mainly because we like making fillets, but also because the berth supports really need them. We also needed new weep holes in the berth supports. Weep holes allow the water that gets in hard-to-reach places to drain into the main bilge area where you can soak it up. Wahoo's berth support had weep holes, but they were just holes drilled through the wood. They were dark and eerie things that I never liked even thinking about. Seriously y'all, some parts of Wahoo have been just plain creepy. Old wood that is dirty and had a lot of moisture, etc. Ewww. So anyway, since we need to add some fillets to the berth supports we figured nice, new easy-to-clean weep holes were in order too.

Plastic is easy to clean, so PVC was the obvious choice. Picked up some half-inch pvc pipe at Lowe's that worked nicely.

New weep holes for the aft part of the berth supports.

Photobucket

I had to drill the original weepholes out to make them a little bigger so the pvc piece would fit. And I rounded the edges of the new pvc weep holes so when we add the fillet it will be a smooth transition from fillet to pvc.

Here they are before the fillet was added.

Photobucket

After I knew they fit okay we removed them and then coated the area with epoxy to protect it and then slid them back in.

And then the fun begins! FILLETS!

See how the weep hole blends right into the fillet? Yeah, I did that! :D

Photobucket

See all the lovely fillets!

Photobucket

Photobucket

HUGE improvement, both in terms of structural stability and also in removing some of the creepiness factor. The whole back of the boat is completely not creepy now. YAY!

Now, if I could just stop being allergic to fiberglass it would all be perfect. Seriously, wear protection if you near the stuff. We always use a respirator and usually a dust suit or are fully clothed. But last weekend I got in a hurry on one part and just threw some baby powder on my arms (supposed to keep the glass from sticking to your skin) and jumped in to grind for a minute. That was not smart. Fiberglass always itches, but this time it broke my arms out in hives. Yikes! So, I'm taking extra precautions to protect my skin before messing with the fiberglass grinding.

And now it's already Friday again and we're back at it first thing tomorrow morning. Not sure what all we plan to do but I'm taking a weekend off from all things fiberglass to give my arms a break. I think we will try to pull out the ports (windows) and reseal those. And perhaps wet sand cigarette burns off the boat.

Cheers from the boat yard!

Monday, September 22, 2008

scrunched up and throwin' some 'glass

Meant to post this on Monday but work was a freakin' bear this week.

Okay, I took my very last vacation day this past Friday to devote to glassing the keelson in. Pam took a day off too to help me. She is becoming quite the boat restorer, my mom is. :D

We knew going into it that glassing in the keelson would be one of the toughest projects we will probably ever have to do on the boat. Besides the fact that we're inexperienced and it's a structural repair, the real thing that makes it hard is it's location. My boat is tiny (18 feet long). So you can imagine that all the spaces in a tiny boat are also tiny. And you would be right if you guessed that the space underneath the cockpit floor is minimal. It's so minimal in fact, that I'm not sure anyone larger than me could even scrunch up in there enough to get to the repair, much less work in such a small area.

This is how I spent my weekend.
Photobucket

See what I mean? There is like NO room in there. Fer real.

So, we have this keelson we need to glass into the bottom of the hull. The keelson is flat and very stiff since we coated the whole thing in fiberglass to protect it. And the hull is rounded and stiff. So these two pieces aren't going to join properly without some help. So the idea was to build up the area underneath where the keelson will go in so that when we glass it in there are no gaps in between it and the hull.

So I started by laying the keelson in place and then going down every few inches and measuring the gap between the bottom of the keelson and the hull. I then drew a line representing the shape of the gap, so we would know about how much to build up the area.

Photobucket

Here's the keelson area after the first few layers of glass:
Photobucket

And here it is again after a bunch more layers of glass:
Photobucket

While I was stuck in such a small area I decided to go ahead and repair the transom. It was just in need of a little reinforcement and some cleaning.

Here is the transom repair:

Photobucket

Nice fillet, if I do say so myself. :P

We basically glassed all weekend long. It was fun, if a little scrunched. :D And now it's already Friday. I plan to go home in 45 minutes, get some beer (a requirement for boat work), and then put a layer of glass in the keelson area to get a jump on the weekend.

Tuesday, September 9, 2008

Wahoo on the move, sort of

In between bouts of hot weather, hurricanes and back aches we've slowly progressed on the boat work. The next big projects all involve structural fiberglassing, and neither of us has any real experience with fiberglass, so we've been taking our time coating the keelson and bridge step support, and I spent several hours laying cloth down to strengthen the berth supports and to learn this new medium. What have I learned? It's messy. Very messy. And you have to be ready once you mix it, cause the whole process goes down so fast. And be prepared for the messiness...have lots of paper towels and vinyl gloves.

The hardest part so far was figuring out how to wrap the cloth around corners. After much trial and error (and messiness) I decided it's easiest to just to lay it out in flat pieces and just cut the extra off when it dries, cause this stuff doesn't like corners. Also took me a bit to figure out how to get epoxy in the hole in the keelson (the hole that the cockpit drain runs through). The entire keelson needs to be coated in fiberglass and epoxy to keep any water out. So we initially had to cut the hole a little larger, to make room for the needed protective epoxy coating. I thought maybe I could wet out some small fiberglass strips and just line them along the inside edges of the hole to build it up, but that didn't work. There were several variations along this line of thought that I tried, but nothing would work on the inside without causing bubbles. Then it occurred to me that I could just fill the entire hole with epoxy and then cut out the correct diameter hole for the cockpit drain after the epoxy is cured. I mean, I have a gallon and a half of the stuff. Why not waste a little to make a job easier.

In a not-so-bright moment I thought masking tape on the bottom would help hold the liquid epoxy in. Duh. When it started oozing out rather quickly, I crammed a plastic cup up in there to help hold it. A LOT leaked out but not all, so I let what remained cure enough to get a little hard and then mixed up another batch and poured it on top, because even with all the mistakes and do-overs, I have enough epoxy to last me years. :)

The tape wasn't the best idea.
Photobucket

So the as the time nears to actually start glassing in these new pieces we've made, it became apparent that it would be very difficult to level the boat (you don't want to build a boat on unlevel ground the same way you wouldn't want to build a house on an uneven foundation) on the ground next to the garage, which is where Wahoo has lived since I bought her in July of '07. It's a slight uphill, and though it would be possible, it was not advised.

So we decided to move the boat to the driveway! :D Right in front of the garage! :D :D

It's not too hard to move the boat. Just hook it to the trailer hitch and with a little careful yard navigating, off you go. The shelter was another story. It's 12' x 20' and has 6 legs. You are supposed to be able to remove the legs, which would have allowed us to each pick up one end of the roof and move it, then move the legs separately and reattach at the new location. But, it's been a wet year (or summer at least-ask anyone here the last time their lawn was green in August/September!) and the legs rusted a tad making them impossible for two tiny girls to remove.

Here's Wahoo in her new spot.
Photobucket

So, on to plan B. Mom mentions roller skates - we could roll it there. My first thought is to laugh. Then I remember those inline skates I bought a few years ago.

A perfect fit.
Photobucket

So we put a skate on each of the legs on one end and I found some little casters from a plant stand that fit on the middle legs.
Photobucket
Photobucket

Then all that was left was for mom to grab one leg and me the other and off we go!

Photobucket
If you look hard you can see the skates on the rear legs.


It took less than ten minutes to move it. A proud moment of Rube Goldberg engineering if there ever was one. Small chicks who work on boats have to be resourceful.

Here she is all safe and sound and soon to be level.
Photobucket

Since it was a hot day and we had the boat sitting on concrete we thought it would be fun to wet sand a few spots to see how much difference it would make.

Along the gunwhale, the previous owner had painted over the pretty blue with a dull blue. I'm guessing it was the wrong kind of paint as it was much more dull than the rest of the hull.

After wet sanding with 400 grit wet/dry - It's like finding a pretty hardwood floor under a nasty old carpet! :D
Photobucket

Seeing the pretty blue come out just made me want to wet sand all day. So we did! :D

Here's a few shots of the deck after the first wet sanding with 400 grit.
Photobucket
Photobucket

And here I applied a little polish just to see if it would shine. And it did. :D
Photobucket

Nice to know we won't have to paint the hull right away. We just have to finish wet sanding the whole thing with 400 then up to 800, then 1000 and then do some serious waxing and she should look decades younger. That's all hard work of course, but not near as hard or as costly as a new paint job.

Next up - this weekend we hope to begin glassing in the keelson. This is a big one. Wish us luck!

Monday, July 14, 2008

From fiberglass dust to sawdust...

So this is it...the big transition from boat demolishing to boat restoration. The big project for this past weekend was to construct a keelson to replace the rotten one I removed earlier. Since the keelson is structural and is glassed into the hull from inside the boat, it pretty much has to be done first, before we can go on to the next project(s).

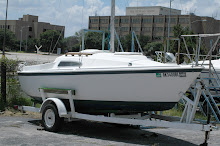
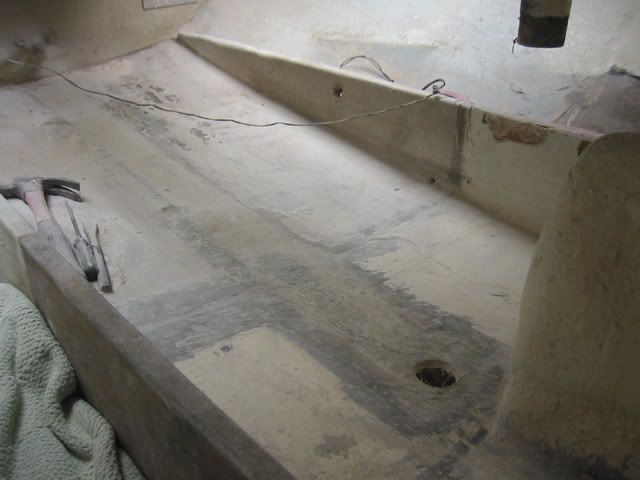
Here is a pic of the boat as it is now, with the old keelson removed and ready for the new one. The keelson will run from the back end of the boat at the transom forward all the way past the hole where the cockpit drain thru-hull goes.

Photobucket

So, the first step, find some wood. Seems simple enough. There's a lumber store here in town. On their website (was surprised they even had one) it says they carry Douglas Fir, which is exactly what we need to construct the keelson from. So I get there and wait for too long only to be told "no, no.....nothing like that around here." The guy was a bit of a jerk, looking at me as if I don't know what I'm asking for. Anyway, so his advice I guess is to give up, as there is no douglas fir in these parts. WHATever!

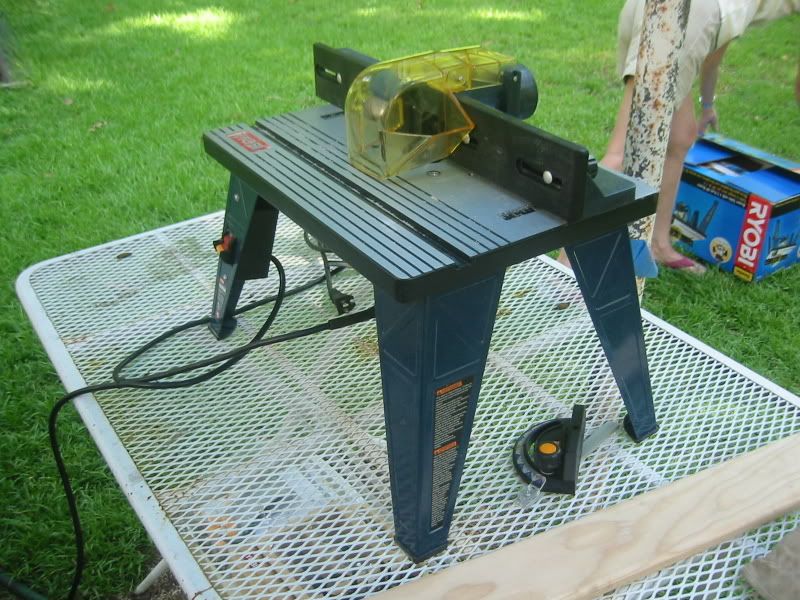
I know Home Depot doesn't have it so I go to the Lowe's website and it shows Douglas Fir in 1x4 boards. So off to Bossier to the nearest Lowe's. They didn't have a lot, but they had the pieces we needed to get going with the keelson and also the bridge step support and cross support (support underneath the main bulkhead) so I was pretty happy about that. Also, while researching all the repairs I'm having to do on the boat it became obvious that at some point I would need a router. Gonna have to get those round edges on all this wood somehow. Lowe's carries Black & Decker tools and the last few things I got from B&D have been pure crap so I'm wary of their stuff. So, even though Home Depot pisses me off frequently, they carry the Ryobi brand tools that I like so much, so we picked up a nice Ryobi router with table and also a nice set of 8 starter bits....all from the Depot.


Photobucket


Anyway, everyone got a cut of my money this weekend, except the one I really wanted to give it to the most, the local small-town lumber supplier. Oh well, he was a jerk, so I kicked him to the curb. No boat money for you!

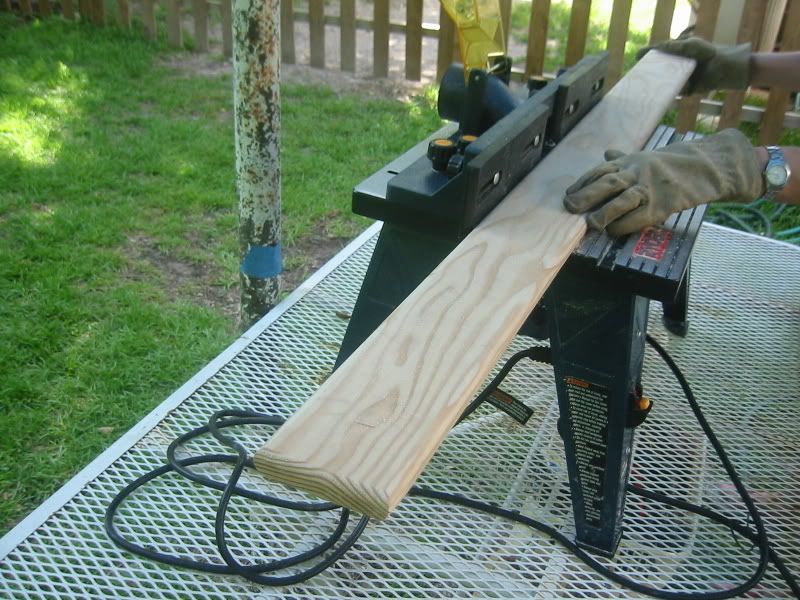
Cutting the board to size was easy. What wasn't as easy was figuring out the exact way to use the router. I mean, I know what it does and how it works, but couldn't figure out how to set up the table guide to feed the wood to the router smoothly. After a few curse words and a slight loss of temper, I figured it out and got right to business, rounding all the edges on the keelson. The keelson needs to be covered in a layer of fiberglass and epoxy and cured before installing - the glass and epoxy makes it stronger and protects it from moisture. You never want fiberglass to bend at 90 degree angles so all the edges must be rounded before glassing. The router did a clean, thorough and fast job.


Photobucket


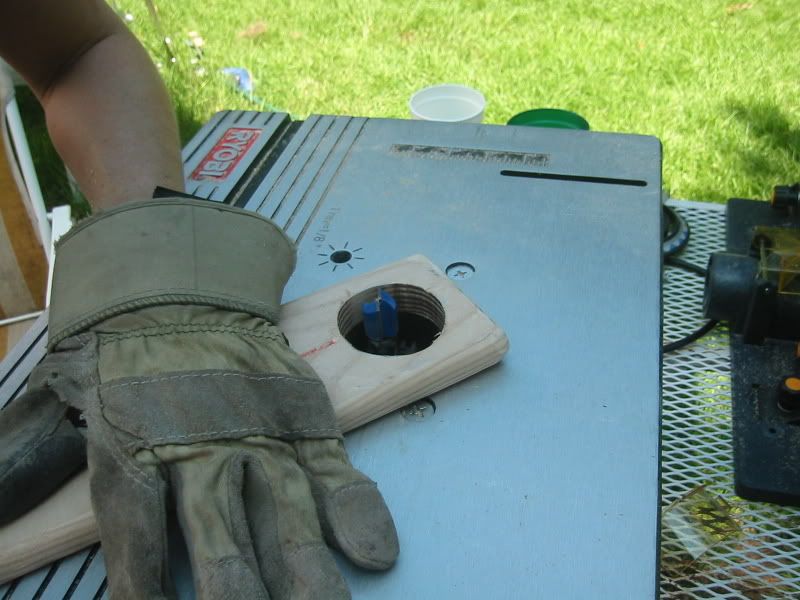
Next was figuring out where the hole in the keelson that the cockpit drain will go through is to be located. Not sure the precise way to do this but the way we did it was for one of us to get in the boat with the keelson and line it up and the other to get under the boat and draw a line around the inside of the hole onto a piece of cardboard.

Next up, cutting a big hole in the keelson. It took several tools - a drill to get the first hole in and then a few more to make it big enough for the jig saw blade to fit. Then jigsaw almost to the edges of the hole. Then back to the new kickass router table to finish out the hole.


Photobucket


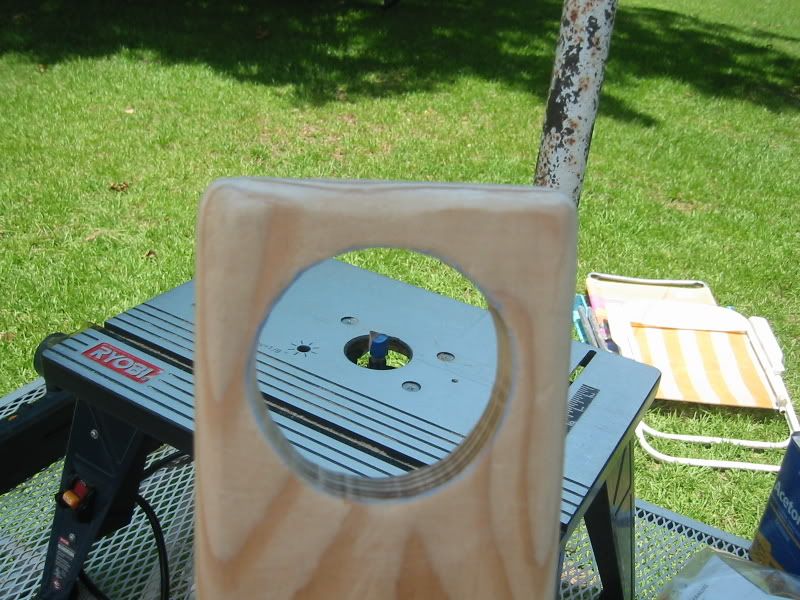
A quick sanding with the dremel and we're done. So, let's put up all the tools, the router and table, everything...put it all up, anything that we won't need again today. I'm one of those people who likes to clean up from one thing before I start another. After everything is put up, Mom reminds me we better check and make sure the hole in the keelson is bigger than the hole in the boat as the hole in the keelson will still need to be coated in glass and epoxy, so we'll be adding thickness to it. So in the boat Mom goes and underneath I go, and it's almost the right size, but not quite. DOH! Back out with the router and table one more time.


Here it is....the nice hole, and the router that made it. :D


Photobucket


Next step was sanding the keelson all over (to make sure the epoxy will adhere to it) and cleaning with acetone. Then, on to some glass work.

First we cut the fiberglass cloth to the desired size. Then, wearing all the appropriate safety gear, mix your epoxy and start wetting it out.


Photobucket
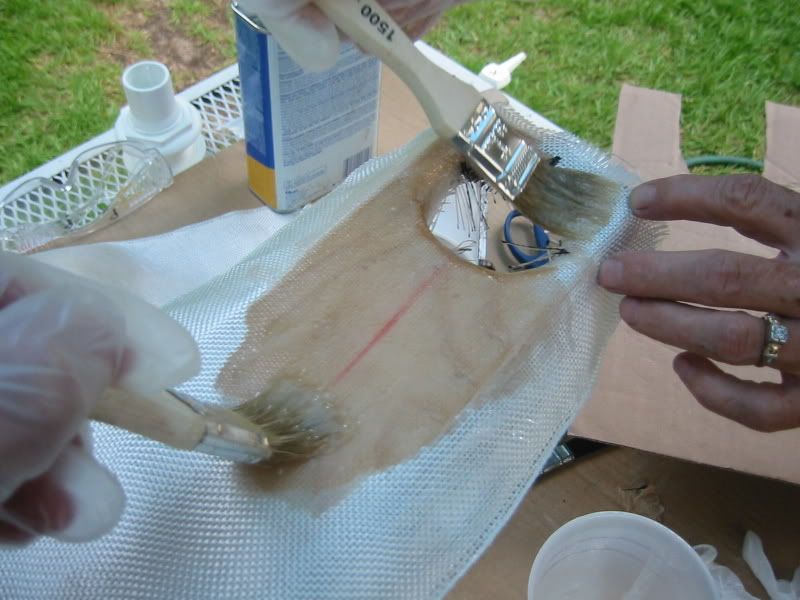
You want to make sure you get it all wet, but not so wet that the glass tape wants to float. You want to squeeze out the excess, then as it starts to get tacky add more layers of epoxy to fill in the weave.


Here's what it looked like after the first coat.


Photobucket
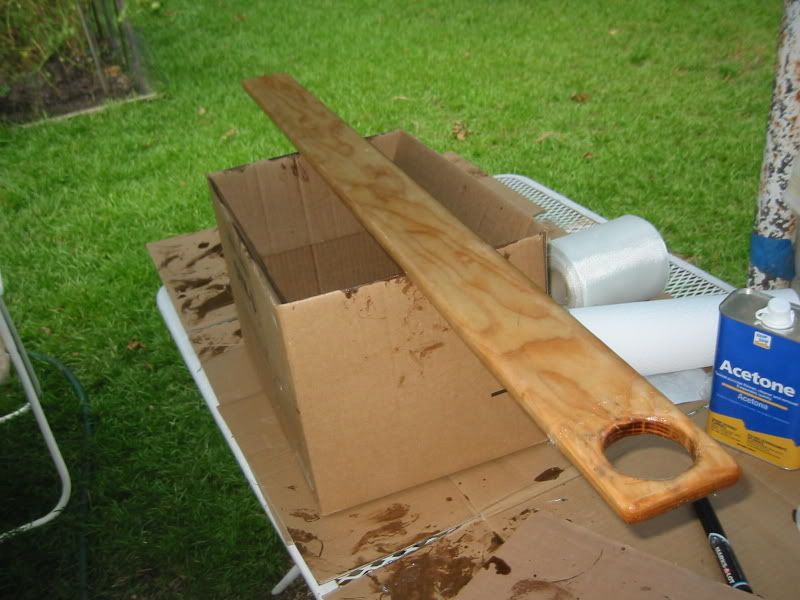
And after being left in my garage overnight it was done (completely hard and not sticky) by lunch today, so that's about an 18-hour cure time.


Know what I think about the new tools, the new skills and the new keelson for the boat?


Photobucket


Thumbs up! :D