Thursday, October 30, 2008

this blog is too serious.


I'm a silly person and my boat is gonna be sailed by two silly people, so some sillyness must exist here, dammit!

Photobucket

Tuesday, October 28, 2008

Portlights removed!

In between all the drama from the Great Epoxy Fiasco of 2008, Pam and I got the portlights (windows) removed. They had to come out due to the extreme lack of a seal around them. Right after I bought the boat I watched in horror as it rained and the portlights leaked so bad it was pouring water inside the boat. A very bad thing. So we knew from the start that they would have to be either replaced or at least removed, cleaned and resealed.

First, the removal.

Most of the screws holding the portlight brackets/frame in came right out, but there were several that wouldn't budge, and a few were completely stripped. So I got one of those cheap screw extractor sets that you lightly hammer one side of the bit into the offending screw, and then use the other side of the bit with a drill to back it out. The first shot at removal saw the extractor bit breaking off into the old screw. Hmmm, now what? On a trip to the store to replace the broken screw extractor bit I'd just damaged I found one called Grab-It! The Grab-It had much beefier bits than the cheapo one I'd just broken, and wouldn't you know it, it removed all the offending screws, except the one that had the broken extractor in it. Luckily, that one came out with a pair of vice-grip pliers. Whew!

That's an entire paragraph just about screw removal. Ha!

The portlights were held in place with a little piece of metal and a few rivets. Rivets are sometimes hard to remove, but my hammer won!

Photobucket

Photobucket

Not exactly sure how I'll secure them when we put them back in, but you can bet it won't be with rivets!

Then, of course, all the gooped up globs of prehistoric silicone had a good grip as well, so with a lot of prying and pulling they finally popped out.

Here are the portlights removed.

Photobucket

Poor Wahoo looks all naked (pronounced neckid in the south) without her windows!

Photobucket

Photobucket

It took quite a while to remove all the silicone from around the windows. I hate silicone. I know it has it's uses, but I seriously hate the stuff. Something about the way it looks when it's aged with years of dirt and grime. I think the only way I can put silicone on my boat is if it's white. That clear stuff just creeps me out, yo.

The lack of windows will provide a little added ventilation for the upcoming epoxy jobs, so we'll leave them out for a while. And since there doesn't seem to be any replacement options that will work without cutting bigger holes out of the deck or making them smaller, I think we'll just clean these up and reinstall them. Hopefully with a little care at installation and some good sealant they'll work fine.

The frame parts of the windows are aluminum and had been painted on the inside, but most of the paint seems to be coming off with some acetone and a hard brush. I don't like using acetone if I can avoid so i think we may try lightly sanding it.

Photobucket

So, despite the Great Epoxy Fiasco of 2008, things are progressing well.

Cheers and happy boat repairing!

The Great Epoxy Fiasco of 2008


That is how it will be remembered by those of us who were there.

I ordered my epoxy in bulk back in March of this year. Because of the enormity of the project I knew I'd be buying the stuff every few weeks if I went with smaller amounts, so buying in bulk just made sense. Since I was buying large bottles buying the pump set to get accurate measuring when mixing the resin and hardener was a no-brainer. Unfortunately for me, the no-brainer part caused me a lot of problems. You see, on the resin bottle it says mix 2:1 with hardener (that's 2 parts resin to 1 part hardener) and on the hardener bottle it says mix 1:2 with resin (that's 1 part hardener to 2 parts resin). So I had this whole 2 to 1 thing going on in my head. And when I received my epoxy and pump set nowhere on the packaging does it say that the pumps are calibrated to be 1 pump each. I didn't notice the little plastic strip glued to the pump to keep it from pumping all the way down, and there was no mention of it when I ordered or received the product. Since my epoxy containers said mix 2 to 1 and my pumps had no directions at all I assumed wrongly that that meant 2 pumps resin to one pump hardener.

I probably would have caught on sooner that my mix was off were it not for two factors. One, the stuff I mixed cured, though a bit more slowly than I was expecting, but it cured rock-solid. The tackiness stage lasted longer than I thought it would, but it is a slow/medium hardener so I figured it was geared more to the slow side. The other factor that kept me from catching the mix-up sooner was that I kept both the resin and hardener containers with pumps installed in a big plastic tote that also had my rolls of fiberglass tape, my acetone, and my assortment of epoxy tools. So I just kept pumping out my wrong mix, over and over again....not noticing anything was up until I took them out to clean out the tote and noticed there was all this hardener left and almost no resin. Oops. Had it not been for that I would have kept on going for several more batches...mixing wrongly with no clue at all.

Well, needless to say I was pretty pissed off initially as all the epoxy work I had done since March is suspect,, meaning we would have to grind it all out and start all over again. Ugh. So after a few days of seriously feeling very down about it all, I recouped and Pam and I got almost all of the bad epoxy out this weekend, everything except the non-structural fillets. Those will be fine as they are. But seriously, the wrongly mixed stuff cured hard, like really really hard. Like we had to buy a new corded angle grinder because the battery-powered one couldn't keep up. Seriously, I don't even understand how epoxy mixed with only half the hardener could get that hard, but it did.

So now we're back where we started, but with a lot more knowledge about epoxy and especially about mixing epoxy. ;)

Thanks to the 2 of you who saw my 'freak out' post and gave me encouragement. It was very much appreciated.

Happy to be back on the right track! Cheers!

Tuesday, October 14, 2008

I'm restoring a fiberglass boat....

...and am severely allergic to fiberglass. WTF :/

Well, severe might be the wrong word as it isn't affecting my eyes, etc. But it does seem to get worse with every exposure.

Researching...

Fiberglass MSDS

Epoxy MSDS

Acetone MSDS

Thursday, October 2, 2008

fillets, fillets and more fillets!

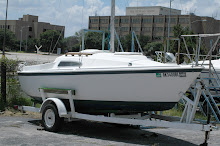
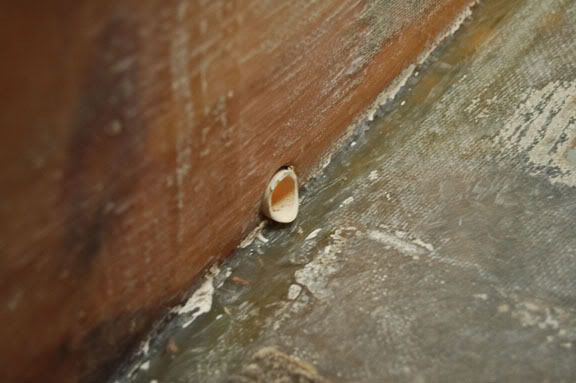
Before I started work last weekend on the boat my friend Dan came over to see how it was progressing. We sat in the cockpit and drank some beers and caught up a bit while he chain smoked marlboro lights. It was our first "Boat Party!" I assumed he was holding his smokes away from the boat as his arm just disappeared over the side and only reappeared when he took a drag.

Well,.......SHIT!!!!!

Photobucket

Dan, if you read this...I love you to pieces, but no more smoking on the boat, man.

Photobucket

Had to happen on a part that had been wet sanded already. Sorry, Wahoo. I'll do better in the future.

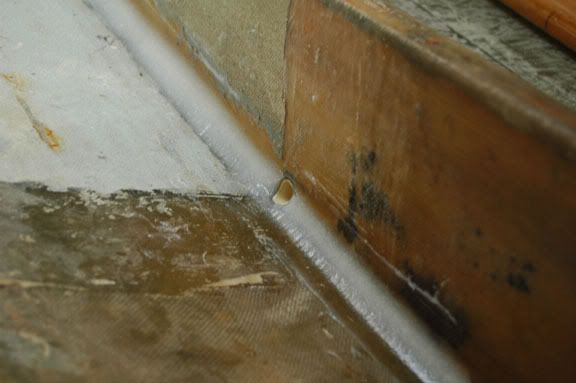
Mom (Pam) and I got up bright and early last Saturday and got to work sanding the fiberglass we had laid the weekend before, so that the next layer will stick. We had planned on building up the keelson area some more and then hopefully finally get the keelson glassed in. However, we decided to work on fillets instead, mainly because we like making fillets, but also because the berth supports really need them. We also needed new weep holes in the berth supports. Weep holes allow the water that gets in hard-to-reach places to drain into the main bilge area where you can soak it up. Wahoo's berth support had weep holes, but they were just holes drilled through the wood. They were dark and eerie things that I never liked even thinking about. Seriously y'all, some parts of Wahoo have been just plain creepy. Old wood that is dirty and had a lot of moisture, etc. Ewww. So anyway, since we need to add some fillets to the berth supports we figured nice, new easy-to-clean weep holes were in order too.

Plastic is easy to clean, so PVC was the obvious choice. Picked up some half-inch pvc pipe at Lowe's that worked nicely.

New weep holes for the aft part of the berth supports.

Photobucket

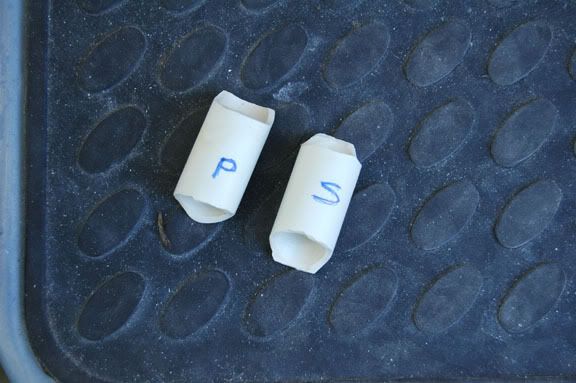
I had to drill the original weepholes out to make them a little bigger so the pvc piece would fit. And I rounded the edges of the new pvc weep holes so when we add the fillet it will be a smooth transition from fillet to pvc.

Here they are before the fillet was added.

Photobucket

After I knew they fit okay we removed them and then coated the area with epoxy to protect it and then slid them back in.

And then the fun begins! FILLETS!

See how the weep hole blends right into the fillet? Yeah, I did that! :D

Photobucket

See all the lovely fillets!

Photobucket

Photobucket

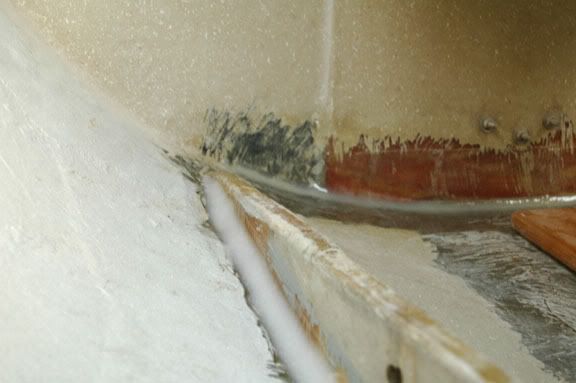
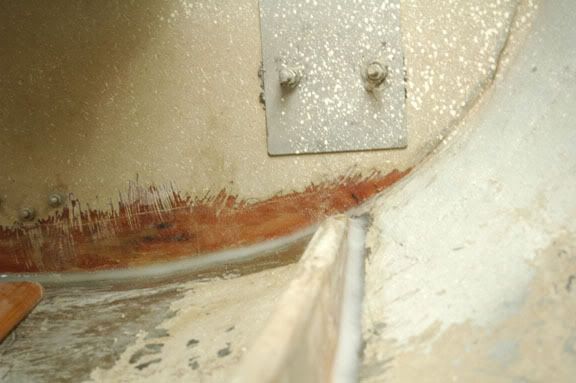
HUGE improvement, both in terms of structural stability and also in removing some of the creepiness factor. The whole back of the boat is completely not creepy now. YAY!

Now, if I could just stop being allergic to fiberglass it would all be perfect. Seriously, wear protection if you near the stuff. We always use a respirator and usually a dust suit or are fully clothed. But last weekend I got in a hurry on one part and just threw some baby powder on my arms (supposed to keep the glass from sticking to your skin) and jumped in to grind for a minute. That was not smart. Fiberglass always itches, but this time it broke my arms out in hives. Yikes! So, I'm taking extra precautions to protect my skin before messing with the fiberglass grinding.

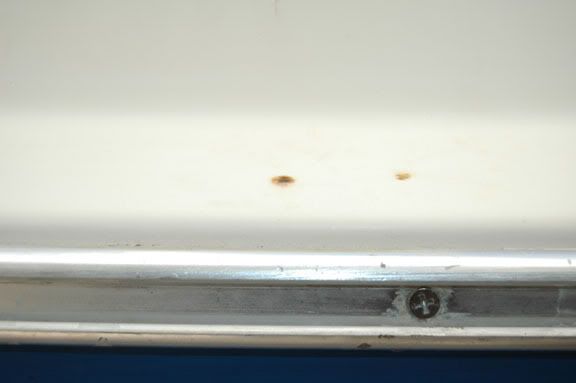
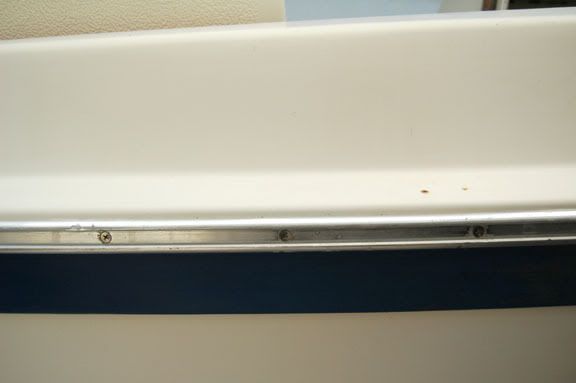
And now it's already Friday again and we're back at it first thing tomorrow morning. Not sure what all we plan to do but I'm taking a weekend off from all things fiberglass to give my arms a break. I think we will try to pull out the ports (windows) and reseal those. And perhaps wet sand cigarette burns off the boat.

Cheers from the boat yard!